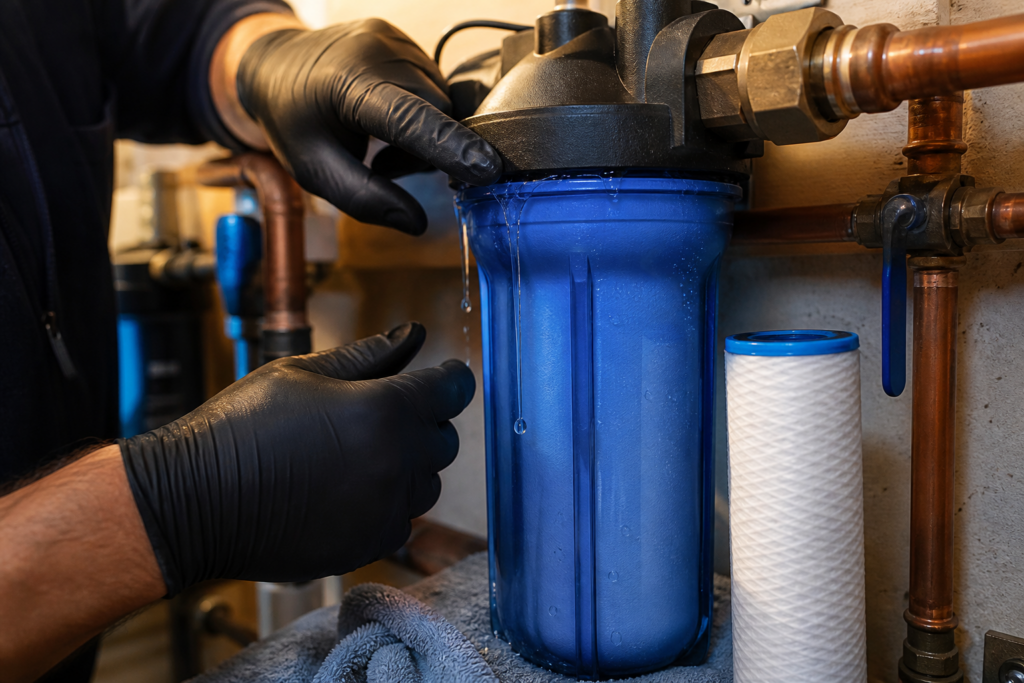
A whole-house water filter that starts leaking right after a cartridge change usually has a problem at the part of the system that was opened, moved, or repressurized. The water may be escaping from the cap-to-canister seam, pressure-relief control, threaded connection, valve, union, housing, or a nearby pipe that was disturbed during service.
The timing is useful, but it does not confirm the cause. A twisted or damaged O-ring is common in this situation, yet a mismatched cartridge, debris on a sealing surface, uneven cap alignment, a cracked housing, or a stressed connection can create a similar leak.
Do not open or tighten the housing while it is pressurized. Keep water away from electrical panels, outlets, appliances, and energized equipment. If you already know which labeled accessible valve isolates the filter, and it can be reached safely, use it without forcing the handle. Follow only the manufacturer’s approved pressure-relief procedure if you are familiar with that exact system. Otherwise, step away and call a plumber.
First, Identify Where the Water Starts
Drying the outside of the assembly can make the first new bead of water easier to locate, but do not remove parts or put your hands beneath a spraying connection. Observe from a safe position while the system is isolated, or while a qualified plumber restores pressure under controlled conditions.
The source usually falls into one of these areas:
- The cap-to-canister seam: Water forms around the circular joint where the housing sump or canister meets the cap. This points toward the O-ring, sealing surfaces, cap alignment, cartridge fit, or housing condition.
- The pressure-relief control: Water appears at the relief button or port instead of the main seam. The control may not have reseated correctly or may have a separate defect.
- An inlet, outlet, union, or threaded connection: The leak starts above or beside the housing and runs down, making the canister look responsible even when the seam is dry.
- A shutoff or bypass valve: Water gathers around a valve stem, handle area, or connection that was operated during the cartridge change.
- The wall or bottom of the housing: A visible crack, split, or pinhole in the canister is different from a seal leak and calls for replacement evaluation rather than more tightening.
- An adjacent pipe: Movement during service can expose a weak connection or existing pipe problem near the filter.
Use a flashlight from a dry location if needed. A photo or short video showing the first wet point can help a plumber distinguish the source from water that has already traveled down the housing.
Why the Cap Seam Can Leak After Service
The large O-ring creates the seal between the cap and canister on many whole-house filter housings. If that ring is twisted, pinched, dry, dirty, mis-seated, stretched, or damaged, water can pass the seal when pressure returns.
Debris on the O-ring groove or the matching sealing surface can produce the same symptom. Even a small particle can keep the surfaces from meeting evenly. A worn groove, damaged cap, or distorted housing may also prevent a reliable seal, even when the O-ring looks intact from the outside.
Cap alignment matters as well. A cap or sump that started unevenly can bind before the sealing surfaces are correctly seated. Trying to solve an uneven joint by applying more force can damage threads, deform a component, or make later removal harder.
These conditions cannot be confirmed while the system remains assembled and pressurized. A plumber should isolate and depressurize the equipment using the manufacturer-specific procedure before inspecting the seal, groove, cap, and housing.
The Cartridge Can Affect How the Housing Seats
A replacement cartridge that is the wrong size, sits off-center, or does not match the housing can interfere with assembly. A cartridge may look close enough while still preventing the canister from meeting the cap correctly. Packaging, model information, and the removed cartridge can help verify the intended replacement without guessing.
This does not mean the cartridge itself always causes the leak. The seal, housing, and connections still need inspection. Avoid trimming, forcing, stacking, or modifying a cartridge to make the housing close.
A Leak That Begins When Pressure Returns Is a Useful Clue
Some housings stay dry while isolated and begin seeping only after the water supply is restored. That pattern suggests the leak depends on system pressure, but it does not prove that the home’s overall pressure is too high.
A damaged seal, cracked housing, loose connection, or valve defect may show itself only when pressurized. A plumber can compare the timing with the exact wet point, inspect the components, and decide whether a pressure measurement is relevant. General weak flow or pressure throughout the home is a separate diagnostic problem and should not be assumed from a localized filter leak.
Why More Tightening or Sealant Can Make Things Worse
A housing wrench is intended for a particular system and procedure; it is not proof that a leaking pressurized canister needs more force. Overtightening can damage threads, distort the sealing area, crack a plastic housing, or trap an incorrectly seated O-ring.
Thread tape or sealant placed on the wrong surface can also hide the true leak without creating a safe repair. The main canister seam may rely on an O-ring rather than thread sealing. Applying tape, caulk, adhesive, or a patch to the outside does not correct a damaged pressure-containing component.
Do not improvise around an unknown bypass, relief control, or shutoff. If a valve is stuck, corroded, unlabeled, or difficult to reach, forcing it can create another leak.
What a Plumber Checks
A condition-led inspection starts by confirming the exact filter assembly, the valves that control it, and the point where water first appears. The plumber can then isolate the system, relieve stored pressure safely, and inspect the components that were involved in the cartridge change.
Depending on the system and observed condition, that review may include:
- Confirming the housing and cartridge model information.
- Checking the cartridge dimensions, orientation, and fit.
- Inspecting the O-ring for twisting, cuts, flattening, stretching, or other damage.
- Cleaning and examining the O-ring groove and matching sealing surface.
- Checking cap and canister threads for uneven engagement or damage.
- Looking for cracks, distortion, impact marks, corrosion, or stress at the housing and bracket.
- Inspecting the relief control, valves, unions, threaded connections, and adjacent pipe.
- Evaluating whether a pressure observation or measurement is relevant to the failure.
After correcting the confirmed problem with compatible parts and the proper assembly procedure, the plumber can restore pressure gradually and inspect the dry housing, seam, valves, and connections. The repair is not confirmed until the equipment remains dry under normal operating conditions.
When to Stop and Call for Help
Arrange professional service promptly when water sprays from the assembly, the puddle is growing, the housing is cracked, the leak returns after another attempt, or you cannot identify a safe labeled shutoff. Also stop if a valve is corroded or stuck, a pipe moves when the housing is touched, or the water appears to come from more than one location.
Avoid the area when water is near an electrical panel, outlet, appliance, pump control, extension cord, or energized equipment. Do not stand in water to reach a valve. The electrical hazard needs to be addressed by the appropriate professional before anyone handles wet equipment nearby.
If the filter is isolated but water continues appearing from a wall, ceiling, floor, or concealed route, the problem may not be limited to the canister. Review the warning signs of a hidden water leak in an Indianapolis home and arrange an inspection rather than repeatedly reopening the filter.
Information to Gather Before the Service Visit
Useful details can shorten the path to a diagnosis. From a safe location, record:
- The housing manufacturer and model shown on an accessible label.
- The new cartridge part number and its packaging.
- Whether the leak began immediately or several minutes after pressure returned.
- The first wet location: seam, relief control, connection, valve, housing wall, or nearby pipe.
- Which accessible valves were operated during service.
- Whether the leak is a slow bead, steady drip, or spray.
- Any visible crack, corrosion, movement, or prior repair.
- A clear photo of the full assembly and a close photo of the source.
Keep the removed cartridge and packaging if available. Do not disassemble the pressurized unit solely to gather more information.
Request Whole-House Filter Leak Service in Indianapolis
A new leak after a cartridge change should be traced to its exact source before the filter returns to normal service. D.W. Plumbing provides water filtration services in Indianapolis, including maintenance support for whole-house filtration equipment.
Contact D.W. Plumbing with the housing and cartridge information, the leak location, when it begins, and any photos you can take safely. Those details give the plumber a clearer starting point for inspecting the seal, cartridge fit, housing, valves, and connected piping.
Frequently Asked Questions
Is the O-ring always the reason a whole-house filter leaks after a cartridge change?
No. A twisted, damaged, dirty, or mis-seated O-ring is one likely cause, but the cartridge fit, sealing surfaces, cap alignment, relief control, cracked housing, valves, and adjacent connections can produce similar symptoms. The first wet location and an inspection are needed to confirm the cause.
Can I tighten the housing while water is still on?
No. Do not tighten or open a pressurized housing. Added force can damage threads, distort the seal, or crack the canister. Isolate and relieve pressure only through the labeled, manufacturer-approved procedure you already understand, or leave the equipment alone for a plumber.
Could the replacement cartridge be the wrong size?
Yes. A mismatched or off-center cartridge can keep the housing from seating correctly. Save the packaging and part number so the plumber can compare them with the housing model. Do not cut, force, stack, or modify a cartridge to make it fit.
Why does the filter stay dry until I turn the water back on?
The leak may require pressure to appear. That can happen with a seal defect, crack, valve problem, or connection leak. The timing narrows the inspection, but it does not prove excessive household pressure or identify the failed part by itself.
Can I keep using the filter if it only drips slowly?
A slow drip can worsen, damage nearby materials, or reach electrical equipment. Isolate the filter safely if you know the labeled controls and arrange service. Do not rely on a towel, bucket, sealant, or repeated tightening as a permanent repair.